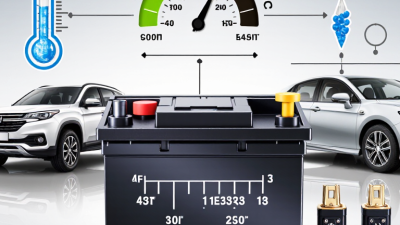
How to Replace a Dead Car Battery Step by Step

A dead car battery can turn a normal morning into a silent driveway and a frustrating delay. Learning how to replace dead car battery safely gives you a practical solution when the engine only clicks. This guide explains the process in clear, manageable steps, from confirming the battery is actually failing to testing the replacement afterward.

AAA automotive expert David Bennett has often emphasized that “the average car battery lasts about three to five years,” although climate, driving habits, and maintenance can shorten that period. His advice matters because a weak battery is not always the only cause of starting trouble. A damaged starter, loose cable, or charging-system fault can create similar symptoms. Do not guess too quickly.

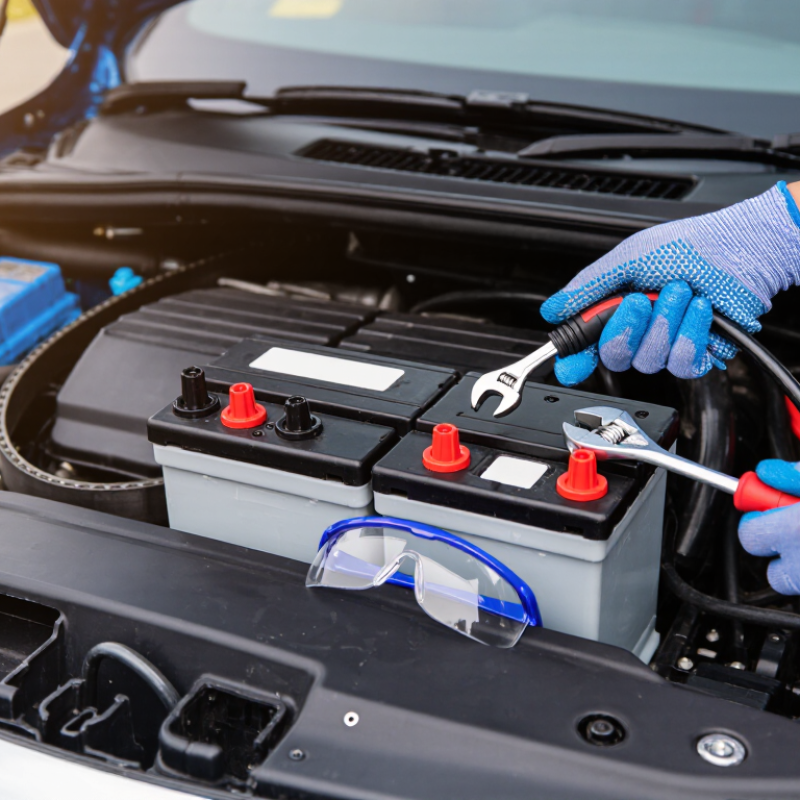
You will need a compatible replacement battery, safety glasses, gloves, and basic hand tools. Check the owner’s manual for the correct group size, terminal layout, and minimum specifications. Park on a flat surface, switch off the ignition, and keep metal tools away from both terminals. Usually, the negative cable comes off first, followed by the positive cable. Reverse that order when installing the new battery.

Small details matter here. A loose terminal can mimic a dead battery. Corrosion may hide beneath the cable clamp. Clean connections gently, but stop if the battery case looks cracked, swollen, or leaking. Do not force anything. After installation, start the vehicle and confirm that the dashboard warnings disappear. If the car still struggles, reconsider the diagnosis and seek qualified assistance. Safety deserves another look.
How to Replace a Dead Car Battery Step by Step

Confirm the Fault: Test a 12-V Battery at 12.6 V or Higher at Rest

Before replacing a car battery, confirm the fault with a voltage test. Park safely, switch off all electrical equipment, and remove the key. A fully charged 12-volt battery should read 12.6 volts or higher at rest. Let it sit.

“Let it sit.”

Ideally, leave the vehicle unused for several hours or overnight. This removes the surface charge created after driving or charging. Set a digital multimeter to DC voltage. Touch the red probe to the positive terminal and the black probe to the negative terminal. Clean corrosion from the terminals before testing. Wear eye protection and work in a ventilated area away from sparks.

A reading between 12.4 and 12.6 volts usually indicates partial to full charge. Below 12.2 volts suggests a deeply discharged battery, but it does not prove permanent failure. Recharge it, wait again, and repeat the measurement. I once rushed this step and nearly replaced a battery that only needed charging. That mistake was expensive.

Resting voltage has limits. A load test can reveal weakness hidden by a normal reading. During engine cranking, a sharp voltage drop may indicate internal damage, although temperature affects the result. Also inspect loose terminals, damaged cables, and charging-system problems. Replacing a battery will not solve a fault that keeps draining or undercharging it. If replacement is confirmed, disconnect the negative cable first and secure the new battery firmly.

How to Replace a Dead Car Battery Step by Step - Confirm the Fault: Test a 12-V Battery at 12.6 V or Higher at Rest
Step Test or Inspection Required Condition or Reading Typical Result Interpretation Recommended Action
1 Prepare the vehicle Vehicle parked safely, ignition switched off, parking brake applied, and all electrical accessories turned off Ready for testing Reduces electrical load and improves the accuracy of the resting-voltage measurement Wait at least 15 minutes after driving or switching off the vehicle before testing
2 Inspect the battery case No cracks, bulges, leaks, severe corrosion, or damaged terminals Case and terminals appear intact A physically damaged battery may be unsafe to test or reinstall Do not handle a leaking or swollen battery unnecessarily; arrange safe replacement and disposal
3 Set up the multimeter Digital multimeter set to DC voltage, commonly using the 20-V range Meter displays DC voltage The incorrect setting can produce an invalid reading or damage the meter Verify the meter leads are connected correctly before touching the battery terminals
4 Measure resting voltage Place the red probe on the positive terminal and the black probe on the negative terminal 12.6–12.8 V Battery is generally fully charged at rest Continue with a load or starting test if the vehicle still has trouble starting
5 Evaluate a slightly reduced reading Resting voltage between 12.4 V and 12.5 V Approximately 75–90% charged The battery may be usable but is not fully charged Recharge the battery, allow it to rest, and repeat the voltage test
6 Evaluate a low reading Resting voltage between 12.0 V and 12.3 V Approximately 25–50% charged The battery is significantly discharged; the low voltage does not alone prove battery failure Recharge and retest; inspect for a charging-system problem or unwanted electrical drain if the voltage falls again
7 Confirm a severely discharged battery Resting voltage below 12.0 V after the vehicle has been off for at least 15 minutes Very low state of charge The battery may be deeply discharged or internally damaged Recharge using the correct procedure, then perform a load or conductance test before deciding to replace it
8 Check for a weak cell Resting voltage remains near 10.5 V after a full charge Abnormally low voltage A shorted or failed cell is likely in a nominal 12-V lead-acid battery Replace the battery and follow local rules for recycling the old unit
9 Perform a starting-voltage check Monitor voltage while the engine is cranked Usually remains above approximately 9.6 V at moderate temperature Battery may have adequate cranking capability Continue diagnosis if the engine still cranks slowly; inspect cables, grounds, and the starter circuit
10 Inspect terminal connections Terminals are tight, clean, and free from heavy corrosion Low-resistance connection Loose or corroded connections can imitate a dead battery Disconnect the negative cable first, clean suitable terminals, reconnect the positive cable first, and tighten securely
11 Check charging voltage after installation Engine running with normal electrical loads Commonly about 13.7–14.7 V, depending on vehicle design and operating conditions Charging system is likely functioning within a common range Investigate the alternator, wiring, or voltage-control system if the reading is consistently too low or excessively high
12 Secure and verify the replacement battery Battery firmly clamped, cables routed safely, and vehicle starts normally Installation complete A secure battery prevents vibration damage and accidental cable contact Reset vehicle settings if required and dispose of the old battery through an approved recycling channel
Safety note: Wear suitable eye protection, keep sparks and flames away from the battery, and follow the vehicle manufacturer’s instructions. Resting voltage is a useful screening measurement, but a proper load or conductance test is needed to confirm battery condition.

Prepare Safely: Apply BCI Battery-Handling and Ventilation Practices

How to Replace a Dead Car Battery Step by Step

Before touching a dead car battery, prepare the work area carefully. Park on level ground, switch off the engine, and remove the ignition key. Keep children and pets away. Open the hood fully. A cool, open driveway is safer than a cramped garage because batteries can release flammable hydrogen gas.

Wear safety glasses and acid-resistant gloves. Remove rings, watches, and loose metal jewelry. Check the battery case for cracks, swelling, wet spots, or a sharp chemical smell. Do not handle a damaged battery.

Ventilate the area continuously, and keep cigarettes, flames, and spark-producing tools far away. Never place metal tools across the terminals.

A practical removal sequence prevents many avoidable mistakes.

Disconnect the negative cable first, then the positive cable. Keep each cable from touching the terminals or metal body parts. Use a correctly sized wrench with steady pressure. Do not lean over the battery while loosening connections. If corrosion covers a terminal, stop and clean it with an approved battery-cleaning method instead of forcing the clamp.

Lift the battery with both hands and keep it upright. It is heavier than it looks. When installing the replacement, secure it firmly before connecting cables.

Attach the positive cable first, followed by the negative cable. Check that clamps cannot twist by hand. I sometimes see people rush this final check, and that small oversight can create loose connections, heat, or starting problems.

Disconnect the Old Battery: Remove the Negative Cable Before the Positive

How to Replace a Dead Car Battery Step by Step

Park on level ground and switch off the engine completely. Remove the key and keep it away from the ignition. Wear eye protection and gloves before opening the hood. Check the battery for cracks, swelling, or leaking fluid. Do not continue if you see serious damage. Ask a qualified technician for help.

Locate the battery terminals and identify the negative cable, usually marked with a minus sign. Loosen the negative terminal first with the correct-sized wrench. Keep the wrench away from nearby metal parts. The battery can release sparks if the tool bridges both points. Lift the negative cable from the terminal and secure it away from the battery. It must not touch the post again.

Now disconnect the positive cable, marked with a plus sign. Cover the loose positive connector so it cannot contact metal. Remove the battery hold-down hardware carefully. Batteries are heavier than they look, so lift with both hands and keep your back straight. I once rushed this step and nearly dropped one on the fender. That mistake taught me to pause and check the cable positions twice. Photographing the connections can also prevent confusion later. Corroded hardware may need professional attention rather than force. Never smoke or create flames near the battery, even during a simple replacement.

Install the Replacement: Match BCI Group Size, CCA, and Reserve Capacity

When installing a replacement battery, match the BCI group size before comparing price or appearance. BCI group numbers identify the battery’s case dimensions, terminal layout, and hold-down position. A battery that fits the tray may still place the positive terminal near metalwork. That is a costly mistake. BCI group-size tables should be checked against the vehicle manual and the old battery label.

Cold-cranking amps matter during freezing starts. SAE J537 defines CCA testing at 0°F, using a 30-second discharge while maintaining at least 7.2 volts. Choose the manufacturer’s specified CCA, or a higher rating when the vehicle allows it. More is not automatically better. Reserve capacity measures how long a fully charged battery can supply 25 amps before reaching 10.5 volts, according to SAE J537. A higher reserve-capacity figure can support electrical loads during alternator problems, but it cannot correct poor fitment.

Before tightening the terminals, compare every number twice. Battery Council International replacement data also emphasizes standardized group dimensions and terminal positioning. I would inspect the hold-down, cable reach, and vent path, not just the label. Small oversights happen. Clean corrosion, seat the battery firmly, and connect positive before negative, following the vehicle service procedure. A battery can have excellent CCA and still fail early if vibration loosens its base.

How to Replace a Dead Car Battery: Match BCI Group Size, CCA, and Reserve Capacity

The chart shows representative replacement targets for several common BCI battery groups. Always confirm the exact group size, minimum cold-cranking amps (CCA), and reserve capacity (RC) in the vehicle owner's manual before installation.

BCI group size determines the battery's physical fit and terminal layout. CCA indicates starting performance in cold conditions, while reserve capacity measures how long the battery can support essential electrical loads if the charging system stops working. The values shown are representative specifications and may vary by battery design.

Reconnect and Verify: Positive First; Confirm 13.7–14.7 V Charging Output

Replacing a dead car battery starts with safe preparation. Park on level ground, switch off the ignition, and remove metal jewelry. Wear eye protection and gloves. Before disconnecting anything, photograph the cable positions. I once trusted my memory and nearly reversed the terminals. That mistake is avoidable.

Disconnect the negative cable first, then remove the positive cable. Lift out the old battery without tilting it. Clean corrosion from the tray and cable ends with a suitable brush. Place the replacement battery securely in the tray. During reconnection, attach the positive cable first. Tighten it firmly, but do not crush the terminal. Connect the negative cable last. A small spark can occur, but a large spark means stop and recheck the connections.

Now verify the charging system with a digital multimeter. Set it to DC voltage and touch the red probe to positive, then the black probe to negative. With the engine running, a healthy charging output should usually read 13.7–14.7 V. Check at idle first. Then switch on the headlights and cabin fan. The reading should remain reasonably stable. If it stays near battery voltage, rises above the expected range, or changes sharply, do not assume the new battery is faulty. Check cable tightness, grounding, and the vehicle’s service instructions. Charging behavior can vary, and one imperfect test is not a diagnosis.